

Carpentry

Get In Touch
07513 860656
ian@handymanian.co.uk
For All of Your Odd Jobs and Gardening Needs

Garden Decking


This garden decking work acquired from nextdoor App. Done on a residential garden in Great Witley. Using Redwood exterior timber. Completed in three days by three men.

Baseframe


Creosoting the Baseframe


Next job was to creosote the frame with lashings of creosote to preserve the wood. Splashed on and not painted on.

Creosoted


Into the second day and the frame is completed. The frontage and left side have metallic plates.
Completed Decking

Roofing Work

Roofing Project

Collaboration with two work colleagues involved repairing a leaky roof. Advertised by the client on Nextdoor App. The Project Leader is Simon Cook, a long term served carpenter and skilled artisan.

What started out as a minor problem really turned out to be a major leak after further investigations. Further materials were purchased. A flu was repaired due to risk of health and safety.
Roofing work in progress

Roof Components. A ridge is a timber board that runs the length of the roof and acts as a type of spine. It is placed at the apex (Bargeboard) of the roof structure.
Roofing work in progress

The uppermost ends of the rafters are then fixed to this. This gives the roof central support and holds the rafters in place. And tiles or slate are used to keep the roof and dwelling waterproof.
Roofing work in progress

Reference: obtainable on request.
Window Blind Installation

From advertising on Gumtree as Window Blind Installer two horizantal blinds were installed in a residential house in Halesowen.
Paid £30 for installing two blinds. Reference: obtainable upon request.
Completed Installation

The procedure of installing blinds is straight forward. First it’s a case of pinpointing where the brackets go that will hold the blinds. By using a centre punch and hammer to make a breaching hole for drilling the screw hole, placing in a wall plug, then the bracket and screwing into place, and finally slotting the blinds into the brackets.
Birmingham Client

Flat Pack Furniture Assembly
Advertised on Bidvine. two items of furniture: a bed divan and a bed. Client purchased the flat pack furniture after moving in to a new house and asked for help with assembly work.
Flat Pack Furniture

Birmingham Client
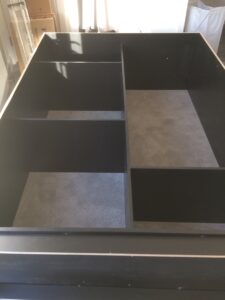
Flat Pack Furniture Assembly
Another contract of flat pack furniture gained from Bidvine and for another Birmingham client. This time a wardrobe.
First stage was to assemble top, bottom, side and middle panels and three shelves with dowels and screws. Respective panels were placed on floor and assembled.
Flat Pack Furniture

Birmingham Client

Flat Pack Furniture Assembly
The wardrobe upright and placed in required position of the room and work started on third stage.
Hanging bars and brackets were screwed into place. Allowing for clothes to be hung later. Further shelves were inserted using shelving supports.
Now the fourth and final stage of placing the sliding mirror doors.
Flat Pack Furniture

Blind Installation
The procedure of installing blinds is straight forward. First it’s a case of pinpointing where the brackets go that will hold the blinds. By using a centre punch and hammer to make a breaching hole for drilling the screw hole, placing in a wall plug, then the bracket and screwing into place, and finally slotting the blinds into the brackets.
Blind Installation


Blind installation carried out in front living room, back living room, kitchen, upstairs front bedrooms, upstairs back bedrooms and the conservatory. Reference: obtainable upon request.
Fixing Door Furniture

Gained from advertising on NextDoor App. A local client asked for door furniture fixings to be carried out on six doors.
Door ironmongery is also termed as “door furniture” and refers to latches, bolts, door handles, door hinges, letter or postal plates and other security devices. The hand of the door is some-times required in order to select the correct items of ironmongery. Basic door fixing is as follows:
Fixing Door Furniture

Ottoman Project

A carpentry project for a wedding present. An ottoman (blanket box) made from three tiers of floorboards.
Ottoman Project

Hartlebury Client

A meeting was taken place at the client’s address to price up a quote to have two carpentry jobs carried out. Fixing two French doors and a garden shed.
Hartlebury Client Continued

The back of this garden house was rotted completely and required a total repair.
Hartlebury Client Continued
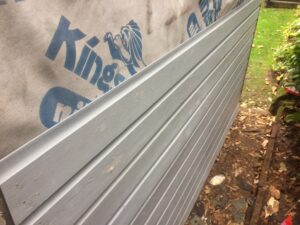
Repair job required re-insulation and new cladding.
Kidderminster Client
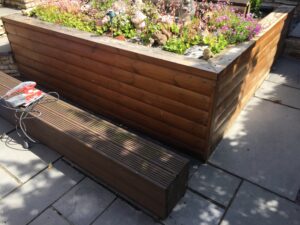
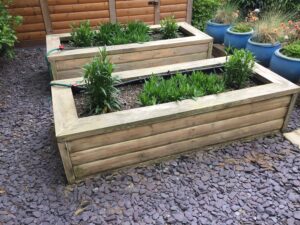
I was asked to sand down some raised flower beds in preparation for them being re-varnished.
Simply a case of me using an orbital power sander and high grade sandpaper. A day’s work.
Pictures display before sanding and finished sanding.
Kidderminster Client
Clows Top Client

Approached by the client from the Nextdoor App to renovate a shed roof. First duty to strip down the old felt and roofing. After buying supplies work commenced with creosoting the underneath roof. Then positioning new layers of wooden roofing and hammering clout nails to hold in place.
Clows Top Client Continued

The new roofing in place. Using a power screwdriver I screwed wooden borders around the roofing to hold the roofing felt.
Clows Top Client Continued

Final stage of placing three sheets of roofing felt and securing it in place hammering clout nails on top and at the side plinths
Stourport Client

A day’s work of blind installation on four windows. A general procedure as done from previous blind installations: fixing the housing brackets into the window recess and positioning the blinds in place with just a few tools of power drill, masonry bits and rachet screwdriver.
Stourport Client

Consisting of four windows: three in the kitchen and one in a bedroom.
Stourport Client

A new client providing a range of duties to do. A meeting involved talking about construction of a framework ready for garage door to be installed at the bottom front of this Wendy House (lodge). With cladding finished off on both sides.
Stourport Client

Left: framework begins
After measuring out the areas where timber frame will be positioned timber was cut. A coping saw used for cutting out shapes around blue poles. Then fastened into place with screws.
Stourport Client

Before completing the cladding work. A polythene membrane was fastened to framework. This provides weather resistance. Now the application of the cladding: the cladding was supplied and job mostly involved measuring each cladding to framework, sawing it off and sawing mitre angles at the ends with a mitre saw and fasten
Stourport Client
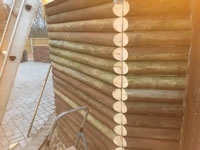
to framework with screws. This process was done to other side of the garage opening too.

Stourport Client

Next place was a few steps up for top of the lodge and to construct new wooden safety railings with supplied timber.

Stourport Client

The supporting pole had three holes chiselled and drilled out as shown.
Along with angled recess at the bottom so to fit on the building as later shown.

Stourport Client

Completed railing as shown
Whilst on the site there became a range of further generalised duties: a baseframe which needed dismantling.


Stourport Client
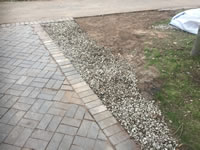
Gravel stones being spread over designated area.
Block paving work on a driveway needed completing and generalised work carried out to support completion of the work: relocating block pavers off the sand ready for laying out, working from other side of the fences so to place bricks underneath gravelboards for extra height. Plus laying some block pavers.
Window cleaning the house windows, car washing, sorting out block paving bricks, edging grass, cementing point up on gaps in laid paving blocks, fixing panels to outdoor spa and reversing fence panels right way out towards road.

Eastham Client

Eastham, Tenbury Wells and a new client. Restoration work on garden furniture: wooden benches and a shed. Displayed above is one garden bench that has collected a lot of mould.
Eastham Client
Below are two side tables. Again with same restoration work required.

Table One

Table Two
Eastham Client
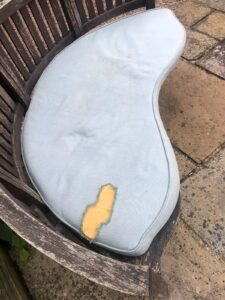
Another garden bench requiring attention but also upholstery work applying to cushion cover.
Eastham Client
A garden shed requiring work of a new roof, repainting all round, holes in the timberwork need repairing stop the country mice getting in.


Get In Touch
07513 860656
ian@handymanian.co.uk
